Electrónica y programación para Microcontroladores.
Libros técnicos para electrónica programable.
Contactanos en:
consultas@firtec.com.ar
PIC18Fxx + Socket + LORA
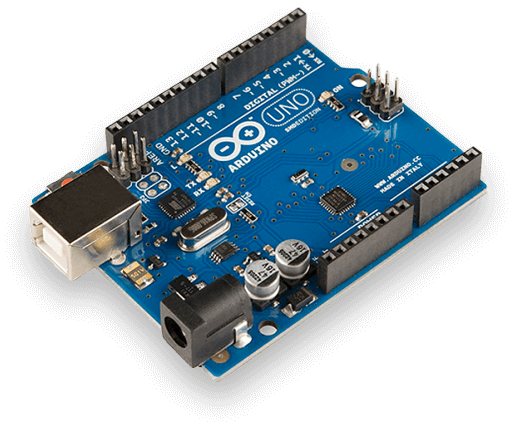
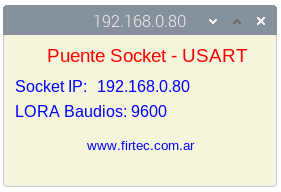
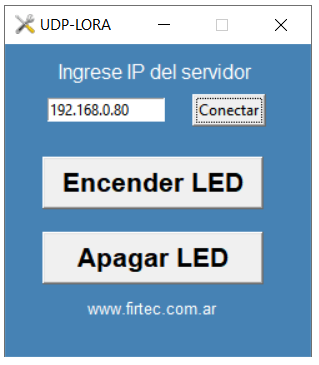
Cuando trabajamos con microcontroladores las comunicaciones seriales son de mucha utilidad, sin embargo la mayor limitación la tenemos en la distancia que podemos cubrir de manera eficiente con un conductor físico o incluso un enlace de radio. Suponga que necesitamos enviar órdenes de control desde cualquier parte del mundo a un sistema con distintas placas que tiene a bordo un Arduino o un PIC18Fxx o cualquier microcontrolador de gama baja o media que no posee conectividad TCP-IP. La solución inmediata podría ser cambiar de arquitectura y colocar hardware compatible con TCP-IP sin embargo esto aparte de ser costoso toma tiempo una migración de todo un sistema a un nivel superior de conectividad. Partiendo del concepto que cualquier micrcontrolador (por mas básico que sea) tiene un puerto UART podemos implementar una solución mucho mas económica que nos permitiría controlar esta placa desde cualquier lugar del mundo. En el ejemplo propuesto tenemos un PIC18Fxx que debe encender/apagar un LED conectado en RB0, a su vez este PIC está vinculado por medio de su puerto serial a un transmisor LORA que envía comandos a un receptor LORA conectado al puerto serial de un computador, en el ejemplo usamos una placa Raspberry PI. En la placa Raspberry se ejecuta un socket de red que sirve como puente entre TCP-IP y el propio enlace LORA, la única limitación que tenemos aquí es la distancia de cobertura del enlace LORA entre el PIC con la placa Raspberry pero el envío de comandos lo podemos realizar desde cualquier lugar sin importar la distancia. Para este ejemplo el socket que envía los comandos tiene solo solo dos botones que envían cada uno un byte de control y el PIC los interpreta para encender o apagar el LED que tiene conectado. Solo es necesario colocar la dirección IP donde queremos enviar los datos y el socket se conecta con su receptor sin importar donde se encuentre y transfiere los datos al microcontrolador. El socket que se vincula con el microcontrolador debe correr en el computador que tiene vinculados los enlaces LORA pero el emisor puede correr en cualquier computador que tenga instalado un interprete Python 3. El código completo del socket que controla el microcontrolador es el siguente.
# -*- coding: utf-8 -*-importtimeimportsocketimportsysfromtkinter.messageboximportshowinfofromtkinterimport*importtkinterastkfromtkinterimportttk,fontUDP_PORT=8080sock=socket.socket(socket.AF_INET,socket.SOCK_DGRAM)defconfigurar_IP():globalUDP_IPUDP_IP=dato_dir.get()boton.focus_set()defapagar():sock.sendto('4'.encode('utf-8'),(UDP_IP,UDP_PORT))defencender():sock.sendto('5'.encode('utf-8'),(UDP_IP,UDP_PORT))ventana=Tk()ventana.title('UDP')ventana.config(bg="Steel Blue")ventana.geometry("200x290")ventana.resizable(0,0)label_IP=Label(ventana,text="Ingrese IP del servidor",bg="Steel Blue",fg="white",font=("Helvetica",12))label_IP.place(x=15,y=10)label_firtec=Label(ventana,text="www.firtec.com.ar",bg="Steel Blue",fg="white",font=("Helvetica",10))label_firtec.place(x=43,y=235)dato_dir=StringVar()caja=Entry(ventana,textvariable=dato_dir,width=15,justify=tk.CENTER)caja.place(x=33,y=40)caja.focus_set()boton=Button(ventana,text="Conectar",command=configurar_IP)boton.place(x=55,y=70)fuente=font.Font(weight='bold')label_voltios=Label(ventana,text="Puerto: 8080",bg="Steel Blue",fg="white",font=("Helvetica",10))label_voltios.place(x=58,y=100)boton_0=Button(ventana,font=fuente,text=' Encender LED ',command=encender)boton_0.pack()boton_0.place(x=20,y=130)boton_1=Button(ventana,font=fuente,text=' Apagar LED ',command=apagar)boton_1.pack()boton_1.place(x=20,y=180)ventana.mainloop()
Para el microcontrolador PIC el código escrito en Mikro C es el siguiente.
1
2
3
4
5
6
7
8
9
10
11
12
13
14
15
16
17
18
19
20
21
22
23
24
25
26
27
28
29
30
31
32
33
34
35
36
37
38
39
40
41
42
43
44
45
46
47
48
49
50
51
52
53
54
55
56
57
58
59
60
61
62
63
64
65
66
67
68
69
70
71
72
73
74
75
76
77
78
79
80
81
82
83
84
85
86
/****************************************************************************** Descripción : Lectura de datos de receptor LORA.** Target : 40PIN PIC18F4620 con un LED conectado en RB0** Compiler : MikroC para PIC v 7.1** XTAL : 40MHZ - (XTAL 10Mhz con PLLx4)** www.firtec.com.ar *****************************************************************************/// Pines asignados al LCDsbitLCD_RSatLATE1_bit;sbitLCD_ENatLATE2_bit;sbitLCD_D4atLATD4_bit;sbitLCD_D5atLATD5_bit;sbitLCD_D6atLATD6_bit;sbitLCD_D7atLATD7_bit;sbitLCD_RS_DirectionatTRISE1_bit;sbitLCD_EN_DirectionatTRISE2_bit;sbitLCD_D4_DirectionatTRISD4_bit;sbitLCD_D5_DirectionatTRISD5_bit;sbitLCD_D6_DirectionatTRISD6_bit;sbitLCD_D7_DirectionatTRISD7_bit;// Variables del programavolatilecharDato=0,bandera=0,Kbhit=0;voidISR_UART()iv0x0008icsICS_AUTO{chartxt[15];if(PIR1.RCIF){Dato=Uart1_Read()&0xFF;if(Dato=='4'){PORTB.B0=0;bandera=1;}if(Dato=='5'){PORTB.B0=1;bandera=2;}PIR1.RCIF=0;}}/*********************************************************** Esta función ajusta los valores por defecto de la* pantalla LCD y coloca los carteles iniciales.**********************************************************/voidDisplay_Init(){LCD_Init();LCD_Cmd(_LCD_CLEAR);Lcd_Cmd(_LCD_CURSOR_OFF);Lcd_Out(1,1,"Comandos por LORA");delay_ms(2000);}/*********************************************************** Esta es la función principal del programa.* Configura pines, comparadores, canales analógicos y se* llama al resto de las funciones.**********************************************************/voidmain(){chark=0,t;TRISB0_bit=0;CMCON|=7;ADCON1=0x0f;Display_Init();UART1_Init(9600);INTCON.GIE=1;INTCON.PEIE=1;PIE1.RCIE=1;Lcd_Out(2,1,"LED: ??");while(1){if(bandera==1){Lcd_Out(2,5,"Apagado ");bandera=0;}if(bandera==2){Lcd_Out(2,5,"Encendido");bandera=0;}}}
El siguiente es el resultado del ejemplo funcionando.